
singer sewing machine troubleshooting manual
Singer Sewing Machine Troubleshooting Manual: A Comprehensive Guide
Navigating common issues with your Singer machine is now easier! This manual provides detailed solutions, from thread problems to timing concerns, ensuring longevity and optimal performance.
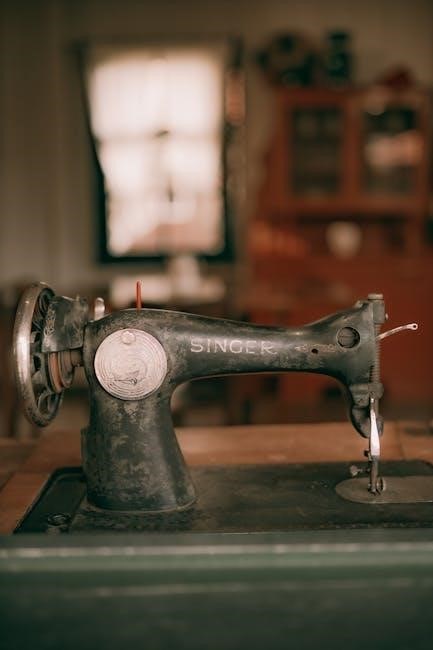
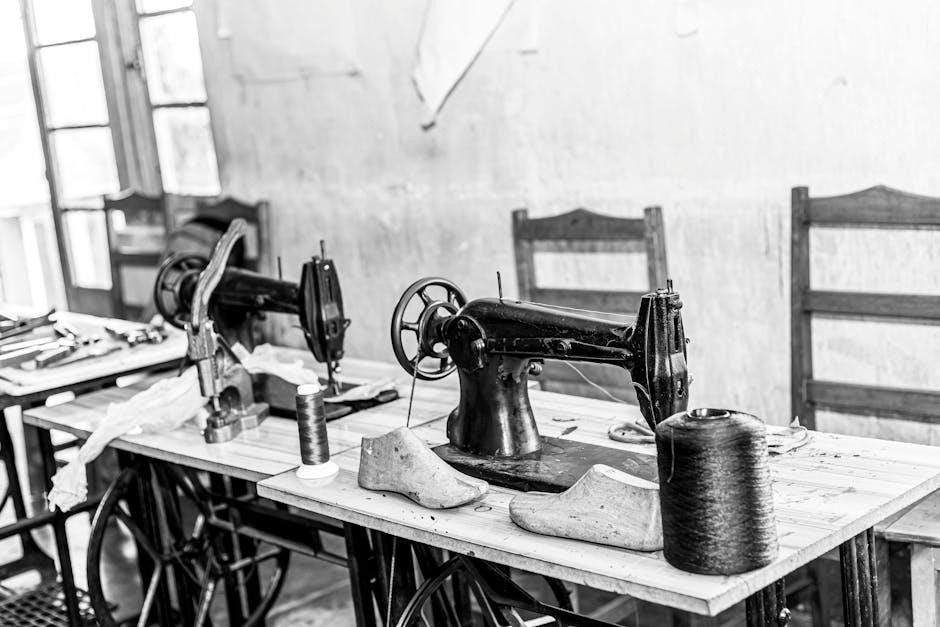
Singer sewing machines, while renowned for their history and accessibility, can present a variety of operational challenges. These issues range from simple fixes, like re-threading or adjusting tension, to more complex problems potentially requiring professional attention; Understanding these common pitfalls is crucial for any sewing enthusiast.
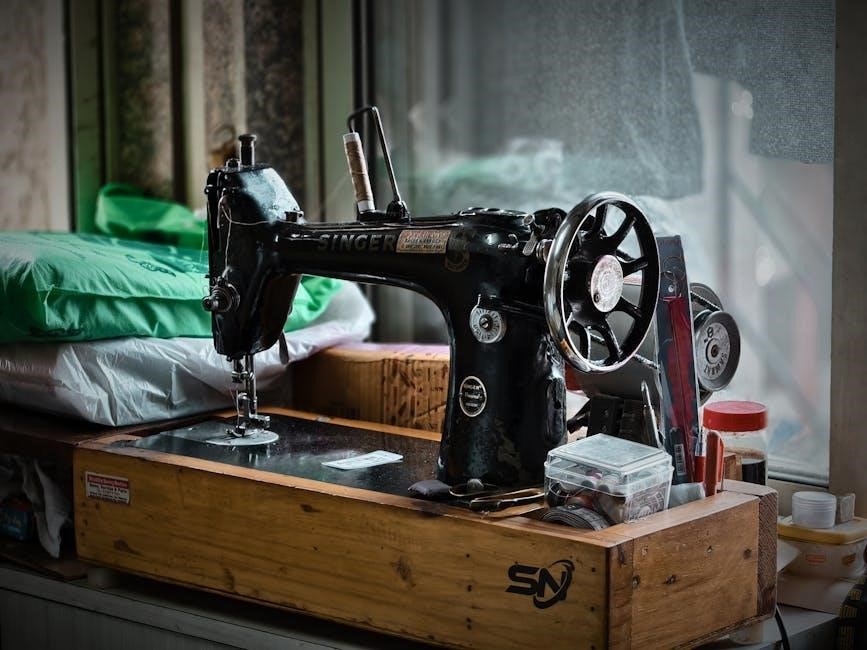
Modern Singer machines, as noted in online forums, sometimes lack the durability of older models. A sudden stop in stitching, like experiencing a machine that “stopped stitching on fabric,” often indicates an internal mechanical disruption, potentially a timing issue caused by jamming. Recognizing these early warning signs – knotted thread, uneven stitches, or complete cessation of operation – allows for prompt intervention.
This guide aims to empower users to diagnose and resolve many common Singer sewing machine problems independently, extending the machine’s lifespan and minimizing costly repairs.
Understanding Basic Sewing Machine Components
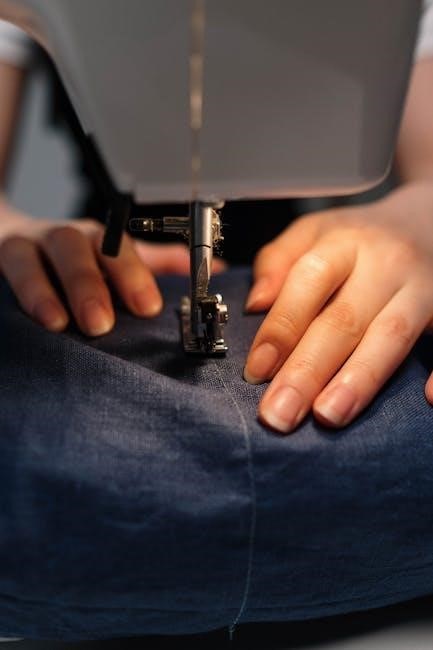
A Singer sewing machine’s functionality relies on the harmonious interaction of several key components. The upper thread path, including the spool pin, tension discs, and needle, dictates thread delivery. Simultaneously, the bobbin and its case, located beneath the needle plate, form the lower stitch component. Proper threading through these areas is paramount, as highlighted by troubleshooting resources.
The presser foot applies pressure to the fabric, ensuring consistent feeding via the feed dogs – the toothed metal pieces beneath the needle plate. Tension control, adjustable via dials, regulates thread tightness. Internal mechanisms, including the timing belt and hook, orchestrate the stitch formation.
Familiarity with these parts is essential for effective troubleshooting; Knowing how each component contributes to the stitching process allows for targeted diagnosis when issues arise, preventing unnecessary repairs.
Common Singer Sewing Machine Problems & Solutions
Encountering issues is normal! This section details frequent Singer machine problems – thread bunching, skipped stitches, broken threads, and jamming – alongside practical, step-by-step solutions.
Problem 1: Thread Bunching Underneath Fabric
Thread bunching beneath the fabric is a common frustration for Singer sewing machine users. This typically indicates an imbalance in thread tension or improper threading. Often, the upper thread isn’t properly engaged, leading to loops forming on the underside of your project. Begin by meticulously checking the tension settings on your machine; ensure they are appropriately adjusted using the tension dials, as modern Singers can be sensitive.
Furthermore, improper bobbin winding can contribute significantly to this issue. A loosely or unevenly wound bobbin won’t provide consistent thread delivery. Finally, carefully retrace the correct threading path of the upper thread, verifying that it’s correctly seated in all tension discs and guides. Even a slight deviation can cause significant problems. Addressing these points will often resolve the bunching.
Sub-Problem 1.1: Incorrect Upper Thread Tension
Incorrect upper thread tension is a primary culprit behind thread bunching. If the tension is too loose, the upper thread will create excessive loops on the underside of the fabric. Conversely, tension that’s too tight can cause the thread to break or pull excessively. Begin by locating the tension dial on your Singer machine – it’s usually numbered.
Start with the recommended tension setting for your fabric type (consult your machine’s manual). Then, test sew on a scrap piece. If bunching persists, incrementally increase the tension, testing after each adjustment. Remember, small changes make a big difference! Properly adjusted tension ensures a balanced stitch formation, preventing those frustrating loops and maintaining stitch quality.
Sub-Problem 1.2: Improper Bobbin Winding
An unevenly wound bobbin is a frequent cause of thread bunching. If the bobbin isn’t wound consistently and tightly, it can lead to inconsistent thread delivery during sewing, resulting in loops and tangles underneath the fabric. Ensure you’re using the correct bobbin type for your Singer machine – using the wrong one can cause winding issues.
When winding, guide the thread correctly through the tension disc on the bobbin winder; A properly tensioned bobbin will wind smoothly and evenly. If the winding is loose or uneven, re-wind the bobbin, paying close attention to thread guidance. A consistently wound bobbin is crucial for maintaining even stitch tension and preventing frustrating sewing problems.
Sub-Problem 1.3: Incorrect Threading of Upper Thread
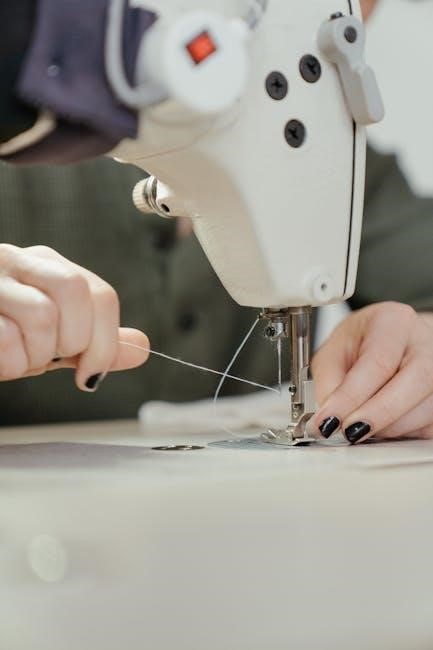
Incorrect upper thread routing is a surprisingly common issue. Even a slight deviation from the correct path can disrupt the tension and cause thread bunching. Carefully retrace the threading path as illustrated in your Singer machine’s manual, ensuring the thread seats correctly in each guide and tension disc.
Pay particular attention to the take-up lever; the thread must be properly engaged. Failure to do so will drastically affect stitch formation. Double-check that the thread is fully inserted into all components. A properly threaded machine ensures consistent tension and smooth operation, eliminating frustrating thread issues and allowing for beautiful, even stitches.
Problem 2: Skipped Stitches
Skipped stitches are a frustrating issue, often indicating a problem with the needle or its interaction with the fabric. This can manifest as gaps in your stitching line, ruining the appearance of your project. Several factors contribute to this, requiring a systematic approach to diagnosis.
Common culprits include a dull, damaged, or incorrect needle type for the fabric being used. Furthermore, using the wrong needle size can also cause skipped stitches. In more serious cases, the machine’s timing may be off, requiring professional attention. Even with a poorly set-up machine, some stitches should still form, albeit loosely or unevenly.
Sub-Problem 2.1: Dull or Incorrect Needle Type
A dull or damaged needle is a primary cause of skipped stitches. Over time, needles lose their sharpness, hindering their ability to cleanly penetrate the fabric. Using the wrong needle type for your fabric is equally problematic. For example, a ballpoint needle is essential for knit fabrics to avoid creating runs or holes, while a universal needle suits woven materials.
Always inspect your needle before starting a project; look for any bends, burrs, or dullness. Replacing the needle is a simple fix and should be your first step when encountering skipped stitches. Ensure the new needle is appropriate for the fabric weight and type to prevent further issues and maintain stitch quality.
Sub-Problem 2.2: Incorrect Needle Size for Fabric
Selecting the correct needle size is crucial for consistent stitching. A needle too small can cause fabric puckering, skipped stitches, and even needle breakage, especially when working with heavier materials. Conversely, a needle too large can damage delicate fabrics, leaving visible holes or distorting the weave.
Generally, lighter-weight fabrics require smaller needle sizes (e.g., 60/8 or 70/10), while heavier fabrics demand larger sizes (e.g., 90/14 or 100/16). Always consult a fabric and needle chart to determine the optimal size for your specific project. Using the recommended needle size ensures smooth fabric penetration and prevents unnecessary strain on your sewing machine.
Sub-Problem 2.3: Timing Issues (Requires Professional Repair)
When a Singer machine’s timing is off, the needle and hook aren’t synchronized, leading to consistently skipped stitches, even with proper threading and needle selection. This often occurs after a significant jam or internal impact. Attempting to fix timing yourself is strongly discouraged, as it involves intricate adjustments requiring specialized tools and expertise.
Incorrect timing can cause further damage to the machine’s internal components. If hand-cranking doesn’t resolve the issue, and stitches remain consistently skipped despite all other troubleshooting steps, a professional repair is essential. A qualified technician can accurately diagnose and restore the machine’s timing, ensuring optimal performance and preventing costly repairs down the line.

Problem 3: Broken Thread
Frequent thread breakage is a frustrating issue, often stemming from a few key culprits. First, meticulously inspect the entire thread path for any obstructions – stray fabric pieces, lint buildup, or sharp edges can weaken and snap the thread. Secondly, ensure you’re using thread that isn’t old or brittle; older spools become prone to breaking due to dryness and wear.
Excessive thread tension is another common cause. If the tension is too high, it puts undue stress on the thread, leading to breakage, especially during faster sewing speeds. Always test tension settings with a scrap fabric before starting your project. Addressing these factors will significantly reduce broken thread occurrences and ensure smoother sewing.
Sub-Problem 3.1: Thread Path Obstructions
A primary cause of broken thread is often a simple obstruction within the machine’s thread path. Carefully examine every guide, tension disc, and opening the thread passes through. Tiny scraps of fabric, accumulated lint, or even a stray piece of thread can create friction and weaken the thread, leading to breakage.
Pay close attention to areas where the thread changes direction. These are common spots for snagging. Gently use a small brush or compressed air to remove any debris. Ensure the thread moves freely without resistance. A clear thread path is crucial for consistent stitching and prevents unnecessary strain on the thread, ultimately reducing frustrating breaks during your sewing projects.
Sub-Problem 3.2: Old or Brittle Thread
Using old or brittle thread is a frequent culprit behind broken thread issues. Over time, thread can degrade, losing its strength and flexibility. Exposure to sunlight, humidity, and temperature fluctuations accelerates this process. Brittle thread is prone to snapping under tension, causing interruptions and frustration during sewing.
To test your thread, try bending a length sharply. If it snaps easily, it’s likely too old and should be replaced. Store thread in a cool, dark, and dry place to prolong its lifespan. Always opt for high-quality thread from reputable brands, as these are less likely to become brittle quickly. Regularly check your thread stash and discard any that shows signs of deterioration.
Sub-Problem 3.3: Excessive Thread Tension
Incorrectly adjusted thread tension, specifically tension that is too high, can lead to frequent thread breakage. When the tension is too tight, the thread experiences excessive stress as it passes through the machine’s components. This strain weakens the thread, making it susceptible to snapping, especially during complex stitch formations or when sewing through thicker fabrics.
Check your machine’s manual for the recommended tension settings for your fabric type. Begin by loosening the upper thread tension dial incrementally and testing the stitch quality. A balanced tension creates even stitches on both sides of the fabric. If the upper thread continues to break, even after loosening, consult a professional for further assistance, as internal issues might be present.
Problem 4: Machine Jamming
A jammed sewing machine can be incredibly frustrating, halting your project mid-stitch. This often occurs when fabric gets caught within the bobbin area, or due to a significant buildup of lint and debris inside the machine. Incorrect fabric handling, such as pushing or pulling the fabric, can also contribute to jamming.
Before attempting to clear a jam, always disconnect the machine from the power source. Gently remove the fabric, being careful not to damage any internal components. Thoroughly clean the bobbin area and the entire machine, removing lint with a brush or vacuum attachment. Remember, forcing the machine to operate while jammed can cause further damage, potentially requiring professional repair.
Sub-Problem 4.1: Fabric Caught in Bobbin Area
Finding fabric lodged in the bobbin area is a frequent cause of machine jamming. This typically happens when the fabric isn’t properly guided or when attempting to sew through overly thick materials. The bobbin case and surrounding components are delicate, so careful handling is crucial.
To resolve this, first, disconnect the power. Gently remove the bobbin case and carefully extract the trapped fabric, avoiding any forceful pulling. Inspect the bobbin case for damage and ensure it’s correctly reinserted. Always use appropriate needles and thread weights for your fabric type to prevent future occurrences. Remember, patience is key to avoid damaging the machine during fabric removal.
Sub-Problem 4.2: Excessive Lint Buildup
Lint accumulation is a silent performance killer for any sewing machine, including Singers. Fabric fibers, thread fragments, and dust collect within the machine’s internal mechanisms, hindering smooth operation and eventually causing jams. Regular cleaning is paramount to prevent this issue from escalating.
Begin by disconnecting the power supply. Use a small brush (often included with the machine) or a specialized lint brush to carefully remove lint from the bobbin area, feed dogs, and surrounding components. A vacuum cleaner with a brush attachment can also be helpful, but use it cautiously. Consistent cleaning, ideally after each sewing session, will maintain optimal performance and prevent frustrating jams.
Sub-Problem 4.3: Incorrect Fabric Handling
Improper fabric handling is a frequent cause of sewing machine jamming, particularly for beginners. Forcing fabric through the machine, or attempting to sew overly thick materials without adjusting settings, can overwhelm the feed dogs and lead to a lockup. Always ensure the fabric is fed smoothly and evenly.
Avoid pulling or pushing the fabric; let the feed dogs do the work. When starting a seam, gently guide the fabric under the presser foot. For thicker fabrics, consider using a walking foot, which provides more consistent fabric movement. Also, reduce the presser foot pressure if needed. Proper technique and appropriate accessory usage are key to preventing jams and ensuring a seamless sewing experience;
Advanced Troubleshooting & Maintenance
Delve into complex issues and proactive care! This section covers uneven stitching, complete machine failure, and vital cleaning routines for sustained performance.
Problem 5: Uneven Stitching
Uneven stitching can be frustrating, but often has a simple fix; This typically indicates an imbalance in how the fabric is being fed through the machine or inconsistencies in pressure. Begin by checking the presser foot pressure adjustment; too much or too little pressure can cause skipped stitches or puckering.
Next, investigate potential feed dog issues. Ensure the feed dogs are clean and moving smoothly, as lint or debris can hinder their function. A damaged or worn feed dog can also contribute to uneven stitches and may require replacement. Finally, confirm that you are using the correct needle and thread combination for your fabric type. Incorrect pairings can lead to tension problems and, consequently, uneven stitching. Addressing these points systematically will usually resolve the issue.
Sub-Problem 5.1: Presser Foot Pressure Adjustment
Adjusting the presser foot pressure is crucial for achieving even stitches. Too much pressure can stretch delicate fabrics, causing puckering and unevenness, while insufficient pressure allows the fabric to slip, resulting in skipped stitches. Most Singer machines feature a dial or screw to control this pressure; experiment with different settings using a scrap of the fabric you’re working with.
Start with a lower setting and gradually increase it until the fabric feeds smoothly without distortion. Remember that thicker fabrics generally require higher pressure, and lighter fabrics need less. Proper adjustment ensures consistent fabric feed, leading to uniform stitch length and preventing issues like thread bunching or uneven seams. Always test your adjustments before sewing your final project!
Sub-Problem 5.2: Feed Dog Issues
Feed dogs are the teeth-like mechanisms under the presser foot that advance the fabric. If they’re damaged, lowered incorrectly, or have accumulated lint, uneven stitching can occur. Ensure the feed dogs are raised to their proper height for normal sewing – a lever or button usually controls this. Inspect them for any broken or bent teeth; damage requires professional repair.
Regular cleaning is vital! Lint and fabric fibers can build up around the feed dogs, hindering their movement. Use a small brush or compressed air to remove debris. If the fabric still isn’t feeding smoothly, try a slightly stickier presser foot. Properly functioning feed dogs are essential for consistent stitch length and preventing fabric bunching or slipping during sewing.
Problem 6: Machine Not Stitching at All
A complete lack of stitching is a frustrating issue, but often has a simple solution. First, check the power supply – is the machine plugged in securely, and is the power switch engaged? Test the outlet with another device to rule out an electrical problem. Next, perform a hand-cranking test by slowly turning the handwheel.
If the machine doesn’t move internally during hand-cranking, there’s likely an internal mechanical issue requiring professional attention. Even with poor setup, some stitching should occur. A knotted or jammed machine can throw off the timing, necessitating a repair shop visit. Modern Singer machines aren’t known for exceptional durability, so internal problems can arise. Don’t force anything; seek expert help.
Sub-Problem 6.1: Power Supply & Switch Check
Begin with the most basic checks: the power supply. Ensure the sewing machine is firmly plugged into a working electrical outlet. It sounds simple, but a loose connection is a common oversight! Test the outlet itself with another device – a lamp or phone charger – to confirm it’s providing power.
Next, verify the power switch is fully engaged. Some Singer machines have a subtle switch position; ensure it’s clicked firmly into the ‘on’ position. Inspect the power cord for any visible damage, such as fraying or cuts. A damaged cord poses a safety hazard and should be replaced immediately. If the outlet and switch are fine, and the cord is intact, proceed to further troubleshooting steps.
Sub-Problem 6.2: Hand Cranking Test for Internal Issues
If the machine remains unresponsive, a hand-cranking test can reveal internal problems. Disconnect the power cord for safety! Locate the handwheel (usually on the right side of the machine) and slowly turn it towards you. Observe the movement of the needle and internal components.
A smooth, consistent motion indicates the basic mechanics are functioning. However, if you encounter resistance, jerking, or unusual noises, it suggests an internal issue – potentially a timing problem or a blockage. Even with poor setup, some stitching should occur. If the handwheel won’t turn, or feels completely locked, a significant internal problem exists. This often requires professional attention, as attempting to fix it yourself could cause further damage.
Regular Maintenance for Singer Sewing Machines
Consistent maintenance is crucial for a Singer’s longevity and performance. Lint buildup is a common culprit behind many issues, so regularly clean the bobbin area and feed dogs with a brush. This prevents jamming and ensures smooth fabric feeding.
Oiling is equally important! Apply a few drops of sewing machine oil to key moving parts – consult your machine’s manual for specific points. Avoid over-oiling, as this can attract dust. Cleaning and oiling prevent friction, reduce wear and tear, and maintain optimal stitching quality. Ignoring these steps can lead to more serious, costly repairs down the line, impacting the machine’s durability.
Sub-Problem 6.3: Importance of Cleaning and Oiling
Regular cleaning and oiling are paramount for Singer sewing machine health. Lint and dust accumulate quickly, hindering smooth operation and causing jams. A thorough cleaning of the bobbin area, feed dogs, and surrounding components with a brush prevents these issues.
Proper lubrication reduces friction between moving parts, extending the machine’s lifespan. Use sewing machine oil specifically – avoid household oils! Apply a few drops to designated points (refer to your manual). Over-oiling attracts dust, so moderation is key. Consistent cleaning and oiling proactively prevent breakdowns, ensuring consistent stitch quality and minimizing the need for professional repairs.
When to Seek Professional Repair
Despite diligent troubleshooting, some issues demand expert attention. If hand-cranking fails to restore stitching, or if the machine consistently jams after clearing obstructions, internal damage is likely. Timing issues, particularly after a knotting incident, almost always require professional adjustment – modern Singers aren’t known for robust durability.
Attempting complex repairs without expertise can worsen the problem. Don’t disassemble beyond your skill level. A qualified technician possesses the tools and knowledge to diagnose and fix intricate mechanical faults. Prioritize professional repair for consistent, reliable performance and to avoid voiding any remaining warranty. Ignoring serious issues can lead to more costly repairs down the line.