
viking stove self cleaning instructions
The Viking stove’s self-cleaning feature offers an efficient and eco-friendly way to maintain your appliance. This guide provides comprehensive steps to ensure optimal performance and longevity through regular cleaning and maintenance.
1.1 Overview of Viking Stove Self-Cleaning Feature
The Viking stove’s self-cleaning feature uses high temperatures to burn food residue, simplifying maintenance. This eco-friendly process eliminates harsh chemicals, reducing environmental impact. Before activation, remove racks and ensure the door is closed. The cycle runs for several hours, requiring minimal effort. Proper preparation ensures efficiency and safety, making it a convenient option for maintaining your stove’s performance and appearance over time.
1.2 Importance of Regular Cleaning for Maintenance
Regular cleaning is essential for maintaining your Viking stove’s efficiency and longevity. Grease buildup can lead to fire hazards and reduce performance. The self-cleaning feature works best when the oven is free from excessive grime. Preventing grime accumulation ensures optimal heat distribution, enhances safety, and keeps your stove in prime condition. Consistent maintenance also prevents unpleasant odors and ensures a hygienic cooking environment for years to come.
Preparing for the Self-Cleaning Cycle
Before initiating the self-cleaning cycle, remove all oven racks, rack supports, and utensils. Wipe up excessive spillovers to minimize smoke and ensure the oven door is tightly closed for safe operation.
2.1 Removing Oven Racks, Rack Supports, and Utensils
Take out all oven racks, rack supports, and utensils to prevent damage during the self-cleaning cycle. Place them in a safe location to avoid accidental exposure to high temperatures. This step ensures the oven can clean effectively without obstructions.
2.2 Wiping Up Excessive Spillovers to Prevent Smoke
Before starting the self-cleaning cycle, wipe up any excessive food spillovers using a damp cloth to prevent smoke and flare-ups. This step ensures the cleaning process remains efficient and avoids unnecessary odors. Avoid using abrasive cleaners or scrubbers, as they may damage the oven surfaces. Properly clearing debris helps the self-cleaning feature work effectively.
2.3 Ensuring the Oven Door is Completely Closed
Before initiating the self-cleaning cycle, ensure the oven door is fully closed and latched. This prevents heat and fumes from escaping, ensuring safety and efficiency. The door will automatically lock during the cycle and remain closed until the oven cools down. Always verify the door is sealed properly to avoid interruptions and maintain optimal cleaning performance.
Activating the Self-Cleaning Cycle
Turn the mode knob to the SELF CLEAN setting and set the temperature control knob to the recommended cleaning temperature. The oven will lock during the cycle for safety and efficiency.
3.1Locating and Using the Self-Clean Mode Knob
The self-clean mode knob is typically located on the front panel of your Viking stove. To activate, rotate the knob clockwise until it aligns with the SELF CLEAN option. This setting initiates the high-temperature cleaning cycle, ensuring a thorough burn-off of food residue. Always ensure the oven door is closed and the knob is securely set to begin the process safely and effectively.
3.2Setting the Temperature Control Knob for Cleaning
Once in self-clean mode, adjust the temperature control knob to the designated cleaning setting, typically marked by a specific indicator or label. Ensure the knob is turned past the cleaning mark to activate the high-temperature cycle, which usually reaches 800°F to 1000°F. Avoid using oven cleaners, as the intense heat will effectively burn off residue. Confirm the knob is securely set to begin the cycle safely and efficiently.
3.3Understanding the Self-Cleaning Cycle Duration
The self-cleaning cycle on a Viking stove typically lasts between 3 to 4 hours, depending on the model and soil level. During this time, the oven heats to extremely high temperatures (800°F–1000°F) to burn off food residue. Once the cycle completes, allow the oven to cool completely before opening the door or wiping away ash. This ensures safety and effectiveness in the cleaning process.
Safety Precautions During the Self-Cleaning Process
Avoid using oven cleaners during self-cleaning. Keep the oven free from grease buildup to prevent fires. Ensure proper ventilation to avoid inhaling fumes or smoke.
4.1Avoiding the Use of Oven Cleaners
4.1 Avoiding the Use of Oven Cleaners
Never use oven cleaners during the self-cleaning cycle, as they can damage the stove’s interior or release toxic fumes. These chemicals are unnecessary, as high heat breaks down food residue. Using cleaners can harm the finish and create hazardous conditions. Always rely on the self-cleaning feature for safe and effective results, avoiding any external cleaning products.
4.2Keeping the Oven Free from Grease Buildup
4.2 Keeping the Oven Free from Grease Buildup
Regularly cleaning your Viking stove prevents grease buildup, which can cause unpleasant odors and damage over time. Always wipe down surfaces after use and avoid letting spills harden. During the self-cleaning cycle, high heat breaks down food residue, making it easier to remove grease without harsh chemicals. This maintenance ensures your stove remains efficient and safe for years to come.
4.3Ensuring Proper Ventilation During the Cycle
4.3 Ensuring Proper Ventilation During the Cycle
Proper ventilation is essential during the self-cleaning cycle to prevent fumes and odors from lingering in your kitchen. Open windows and ensure your exhaust fan is running to circulate air effectively. This step minimizes smoke and unpleasant smells, ensuring a safer and more comfortable cleaning process. Adequate ventilation also helps the oven cool down faster after the cycle completes.
Post-Cleaning Steps
After the cycle, let the oven cool completely before wiping residue with a damp cloth. Reassemble racks and utensils, ensuring everything is clean and secure.
5.1Allowing the Oven to Cool Down Completely
5.1 Allowing the Oven to Cool Down Completely
After the self-cleaning cycle, turn off the oven and let it cool entirely. This ensures safety and prevents damage. Avoid opening the door until cooled; residual heat can cause burns. Once cooled, proceed to clean residue easily. Patience is key for effective post-cleaning results and appliance longevity.
5.2Wiping Away Residue with a Damp Cloth
5.2 Wiping Away Residue with a Damp Cloth
Once the oven has cooled, use a soft, lint-free cloth dampened with water to wipe away loosened residue. For tougher spots, a mild vinegar solution can be applied. Gently scrub to avoid scratching surfaces. Rinse the cloth frequently to prevent spreading residue. Dry the oven thoroughly with a clean towel to remove moisture and prevent water spots, ensuring a pristine finish.
5.3Reassembling Oven Racks and Accessories
5.3 Reassembling Oven Racks and Accessories
After the self-cleaning cycle, allow the racks and accessories to cool completely before handling. Reinstall the oven racks, ensuring they align properly with their supports. Replace any removable utensil holders or grids, securing them firmly. Double-check that all components are in their correct positions for safe and efficient cooking. This step ensures your Viking stove is ready for its next use with optimal performance and functionality.
Maintenance Tips for Long-Term Efficiency
Regularly wipe down surfaces, check oven liners, and schedule professional maintenance to ensure your Viking stove operates efficiently and maintains its performance over time.
6.1Regular Wipe-Downs to Prevent Grime Accumulation
6.1 Regular Wipe-Downs to Prevent Grime Accumulation
Regular wipe-downs are essential for maintaining your Viking stove. After each use, gently clean surfaces with a damp cloth to remove food residue and splatters. This prevents grime buildup, which can hinder performance and lead to tough stains. For tougher spots, mix water with a small amount of mild detergent and apply with a non-abrasive sponge. Avoid harsh chemicals to preserve the finish.
6.2Checking and Replacing Oven Liners as Needed
6.2 Checking and Replacing Oven Liners as Needed
Regularly inspect oven liners for wear, tears, or excessive grease buildup. Replace them every 1-2 years or when damaged to ensure optimal performance. Use only Viking-approved liners to avoid risks like electric shock or fire. Clean or replace liners before they become heavily soiled, as this can interfere with the self-cleaning process. Always follow the manufacturer’s guidelines for installation and maintenance to keep your stove functioning safely and efficiently.
6.3Scheduling Professional Maintenance if Issues Arise
6.3 Scheduling Professional Maintenance if Issues Arise
For persistent issues or complex problems, contact Viking-authorized professionals; They can address errors, repair faulty components, and ensure safety. Regular maintenance by experts prevents major repairs and extends the stove’s lifespan. Schedule annual checkups to maintain optimal performance and adhere to warranty conditions, ensuring your Viking stove operates efficiently and safely for years to come.
Troubleshooting Common Issues
Address error codes, unpleasant odors, and a stuck oven door by referring to specific subheadings for detailed solutions and maintaining your Viking stove’s optimal performance.
7.1Resolving Error Codes During the Self-Clean Cycle
7.1 Resolving Error Codes During the Self-Clean Cycle
Refer to your Viking stove’s user manual for specific error code meanings. Turn the oven selector knob to the “OFF” position and allow the appliance to cool completely. Once cooled, the oven door will unlock, and the error code may reset. For persistent issues, consult the troubleshooting section of the manual or contact professional support to ensure proper resolution and maintain your stove’s functionality.
7.2Addressing Unpleasant Odors After Cleaning
7.2 Addressing Unpleasant Odors After Cleaning
Unpleasant odors after cleaning can result from residue left behind. Ensure the oven is completely cool before wiping down surfaces with a damp cloth. Avoid using harsh chemicals, as they may leave lingering smells. For persistent odors, run a short self-clean cycle with a heat-resistant dish of water and white vinegar inside. Proper ventilation during and after cleaning helps eliminate any remaining odors effectively.
7.3Fixing a Stuck or Malfunctioning Oven Door
7.3 Fixing a Stuck or Malfunctioning Oven Door
If the oven door is stuck or malfunctioning, ensure it has cooled completely before attempting to open it. Check for blockages or residue that may be obstructing the door. If the issue persists, inspect the door hinges and lock for damage or debris. Lubricating the hinges with a non-stick spray may resolve the issue. If the problem remains, contact a professional technician for further assistance.
Cleaning the Exterior of the Viking Stove
Cleaning the Viking stove’s exterior involves using non-abrasive cleaners on stainless steel surfaces and polishing knobs. Regular maintenance ensures a pristine appearance and functionality, avoiding harsh chemicals.
8.1Using Non-Abrasive Cleaners for Stainless Steel Surfaces
For stainless steel surfaces, use non-abrasive cleaners to avoid scratches. Apply a small amount to a soft cloth, gently wipe in the direction of the grain, and dry thoroughly. Avoid harsh chemicals or abrasive materials, as they can damage the finish. Regular cleaning prevents grime buildup and maintains the stove’s polished appearance. Always test a small area first to ensure the cleaner is compatible.
8.2Polishing Knobs and Decorative Elements
Polish knobs and decorative elements using a non-abrasive cleaner and a microfiber cloth. Apply the cleaner sparingly, rub gently in a circular motion, and buff to restore shine. Avoid harsh chemicals or abrasive materials that could scratch surfaces. Regular polishing maintains the aesthetic appeal of your Viking stove, ensuring knobs and trim remain pristine and functional. Always dry thoroughly to prevent water spots.
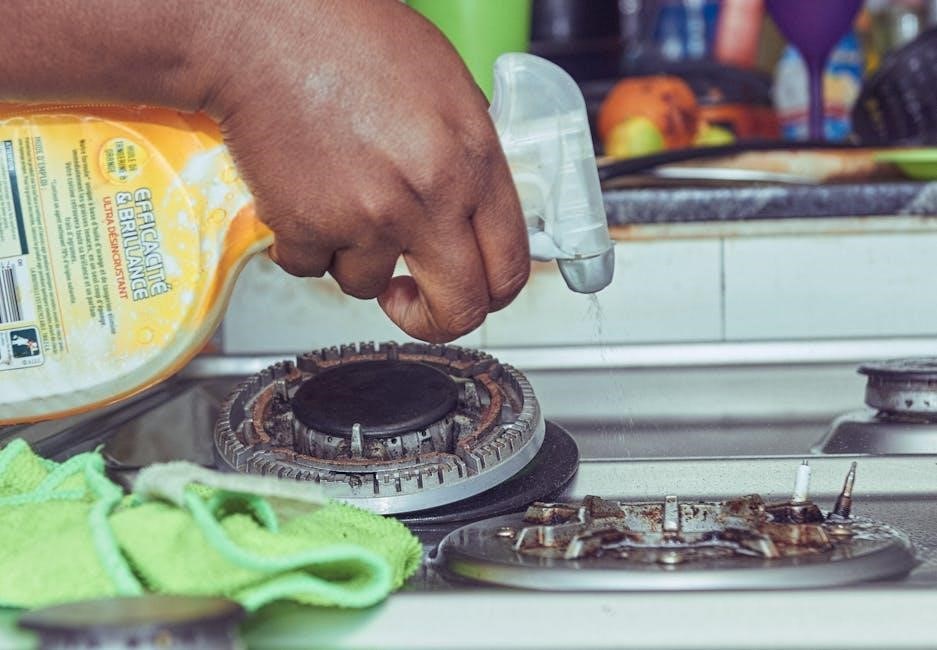
8.3Maintaining the Burners and Griddle
Clean burner caps by soaking them in warm soapy water, then scrubbing gently with a non-abrasive sponge. For the griddle, mix 1 quart of warm water with 1 cup of white vinegar, and scrub with a non-abrasive pad. Rinse thoroughly and dry to prevent water spots. Regular maintenance ensures optimal performance and prevents stubborn stains from forming on these high-use components of your Viking stove.
Deep Cleaning Specific Components
Remove knobs and decorative rings, clean the inside compartment thoroughly, and reassemble. This ensures all parts are spotless and functioning optimally after cleaning.
9.1Disassembling and Cleaning Stove Knobs
9.1 Disassembling and Cleaning Stove Knobs
Remove stove knobs and decorative rings for thorough cleaning. Soak them in warm water with dish soap or a gentle cleanser. Scrub with a soft brush to remove grime. Rinse thoroughly and dry before reattaching. Regular cleaning prevents grease buildup and ensures smooth operation. Avoid harsh chemicals to maintain the finish. This step ensures knobs function properly and look like new after cleaning.
9.2Soaking and Scrubbing Burner Caps
9.2 Soaking and Scrubbing Burner Caps
Remove burner caps and soak them in warm soapy water for 30 minutes. Use a soft-bristle brush to scrub away grease and food residue. Rinse thoroughly with clean water and dry before reinstalling. Avoid using abrasive cleaners or scouring pads, as they may damage the finish. Regular cleaning ensures optimal burner performance and prevents clogs. This step is essential for maintaining your Viking stove’s efficiency and appearance.
9.3Sanitizing the Griddle and Other Accessories
9.3 Sanitizing the Griddle and Other Accessories
Clean the griddle with a mixture of 1 quart of warm water and 1 cup of white vinegar. Use a non-abrasive scrubber to remove food residue. Rinse thoroughly and dry with a clean towel to prevent water spots. For other accessories, soak them in soapy water, scrub gently, and sanitize with a vinegar solution. Avoid harsh chemicals to maintain the finish and ensure hygiene. Regular sanitizing keeps your Viking stove accessories in pristine condition and ready for use.
Preventative Measures for Easy Future Cleaning
Preventative measures ensure your Viking stove remains clean and efficient. Regularly wipe surfaces after use, use non-abrasive cleaners, and maintain a cleaning schedule. Store supplies nearby.
10.1Using Oven Liners to Catch Spills
Using oven liners is an effective way to catch spills and splatters during cooking. Place heavy-duty aluminum foil or silicone mats at the bottom of the oven cavity to trap food debris. This prevents stubborn stains and reduces smoke during the self-cleaning cycle. For best results, clean or replace liners after each use to maintain efficiency and prevent residue buildup over time.
10.2Scheduling Regular Cleaning Sessions
Regular cleaning sessions are essential for maintaining your Viking stove’s performance. Schedule self-cleaning cycles every 1-3 months, depending on usage. Set reminders on your calendar to ensure consistency. Frequent cleaning prevents tough stains and grime buildup, making future maintenance easier. Consistency also prolongs the lifespan of your appliance, ensuring it operates efficiently for years to come. A clean stove not only enhances functionality but also improves safety and hygiene in your kitchen.
10.3Storing Cleaning Supplies Nearby for Convenience
Keeping cleaning supplies within easy reach ensures regular maintenance of your Viking stove. Store non-abrasive cleaners, sponges, and microfiber cloths near the stove. A small caddy or bucket with essentials like white vinegar and baking soda can simplify the process. This convenience encourages frequent wipe-downs and quick cleanups, preventing grime buildup and maintaining your stove’s efficiency and appearance over time.
Regular self-cleaning and proper maintenance ensure your Viking stove remains efficient and long-lasting. Follow these steps to keep your appliance in top condition for years to come.
11.1Summarizing the Self-Cleaning Process
11.1 Summarizing the Self-Cleaning Process
The Viking stove self-cleaning process involves preparing the oven by removing racks and utensils, activating the self-clean mode, and ensuring the door is closed tightly. Avoid using oven cleaners, as they can damage the appliance. The cycle heats the oven to high temperatures, burning food residue into ash. After completion, let the oven cool, then wipe away residue with a damp cloth. This method is efficient, safe, and maintains your stove’s performance.
11.2Final Tips for Maintaining Your Viking Stove
11.2 Final Tips for Maintaining Your Viking Stove
Regularly wipe down surfaces, check oven liners, and use non-abrasive cleaners to preserve your Viking stove’s appearance and functionality. Avoid harsh chemicals and ensure proper ventilation during cleaning. Store cleaning supplies nearby for convenience and address spills promptly to prevent grime buildup. By following these tips, you’ll maintain your stove’s efficiency, aesthetics, and longevity, ensuring it remains a reliable kitchen companion for years to come.